
Hello scrappers!! It's time to finish up with the "Sweet Daughter" mini-album series of posts. In this post I will go over the design of the inside pages and give brief instructions of each page. If there is some technique or design element that you don't understand how I did, or want more info about...
Please don't hesitate to comment and ask.
I will be glad to discuss it further with you. :) I hope you enjoy!!
Happy Scrappin',
Please don't hesitate to comment and ask.
I will be glad to discuss it further with you. :) I hope you enjoy!!
Happy Scrappin',

This mini-album was created with the DCWV "The Preppy Princess" stack,
My Mind's Eye "Madison Avenue" glitter stickers, Tim Holtz "Vintage Photo" Distress Ink,
silk flowers from "Spare Parts", diamond stickles, and coordinating open-stock cardstock.

The first page was a tag/pocket page. I used the cut-apart pages from the stack to make the pocket, matted with brown, then pink cardstock.

This is the front of the tag from the first page. I used a piece of patterned cardstock
from the stack and punched with a decorative corner punch. I inked the edges & added a crown sticker in the bottom right corner. I used silk flowers from "Spare Parts" with a pink button center for the "pull tab".

This is the back of the tag. I used a cut-apart from the stack, punched
with the same decorative corner punch. I then inked the edges & added some
stickles around the journaling block & the crown. I used a silk flower with a pink button
center for the "pull tab" on this side also.

This is the second page. I stamped/embossed decorative corners and "fussy cut"
them out to give more dimension. I then layered silk flowers, added a button
center, put in 3 decorative stick pins, and added a glitter sticker banner. I also
added some stickles to edges of one of the flowers for added sparkle!

This is a close-up of the flower detail on the second page.

This third page is my favorite! I covered 2 library pockets with patterned cardstock
from the stack. Wrapped baker's twine around the pocket twice,
then finished them off with a bow. I added more embellishment to the page
by adding some flowers with cardstock sticker centers and a title
cardstock sticker matted with solid pink cardstock.
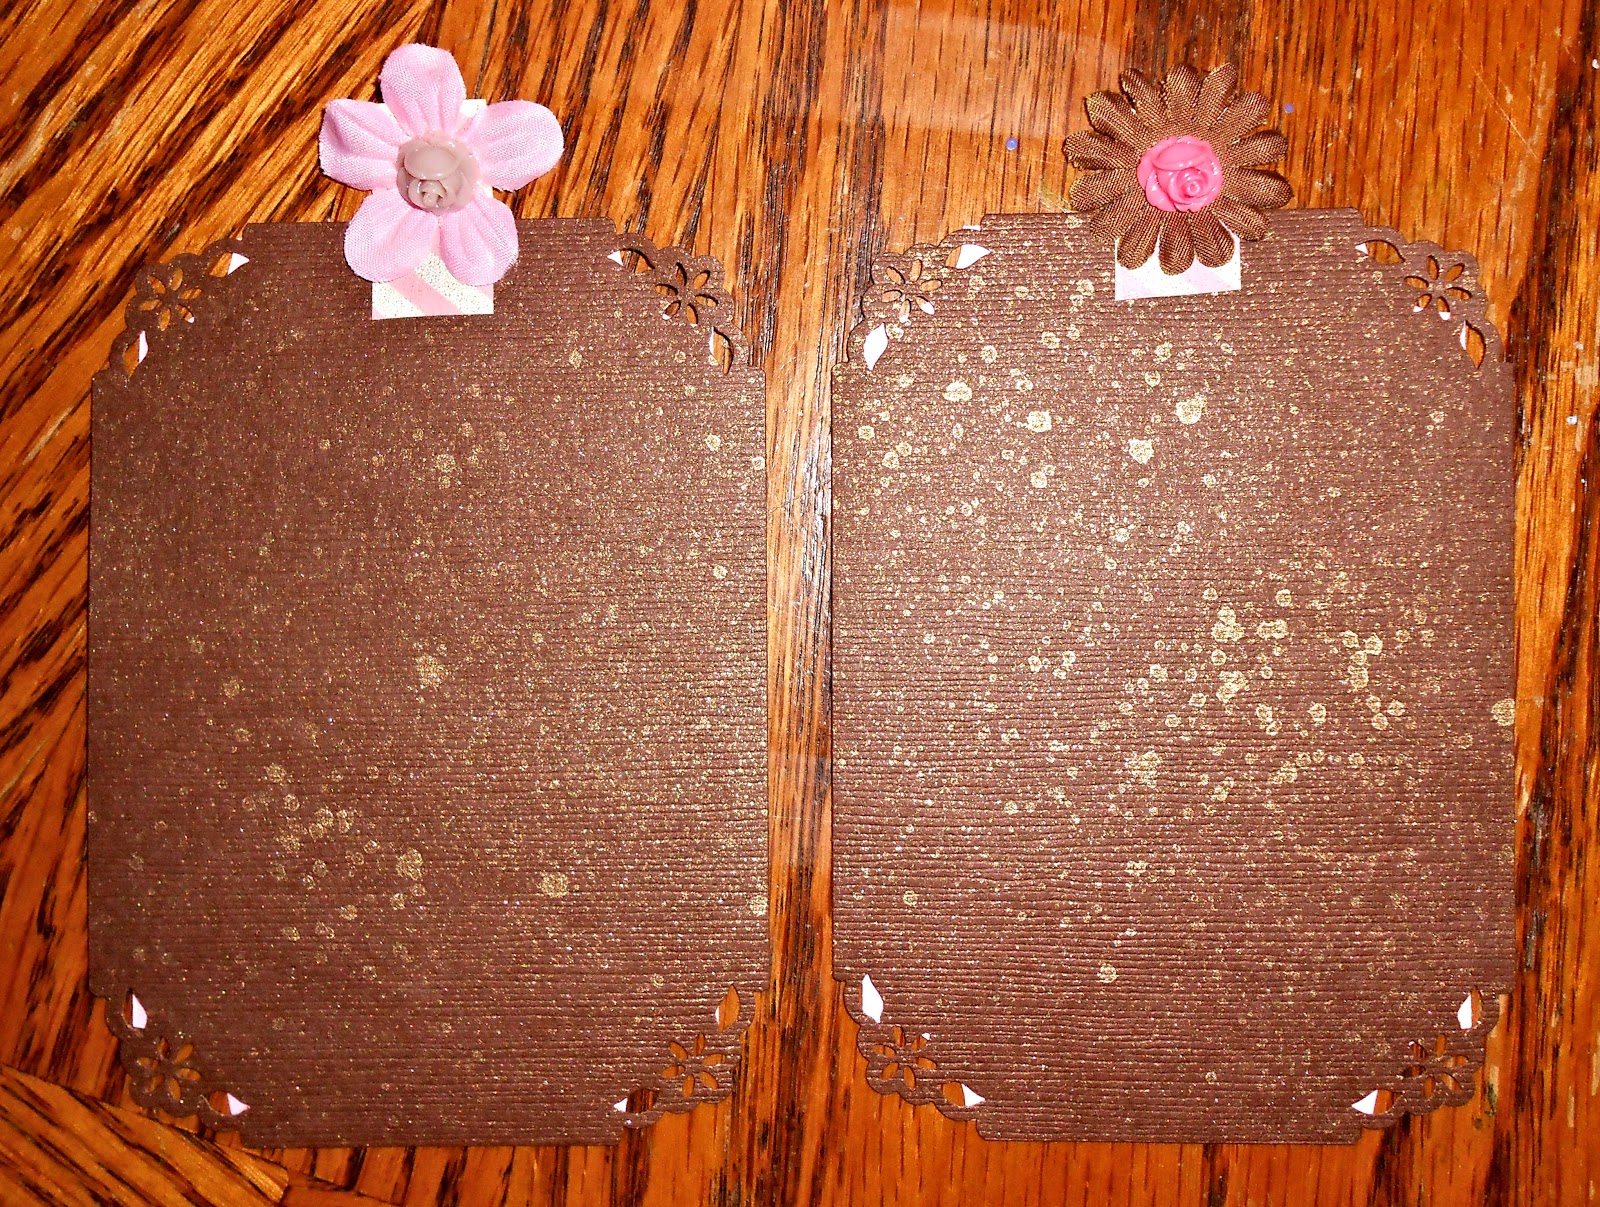
After adhering the pockets to the page, I made 2
tags from the solid brown cardstock. I punched the tags with the decorative
corner punch, spritzed with homemade glimmer mists, and added
a pull tab made with washi tape. To make the pull tab more decorative,
I added a silk flower with a resin flower center.

On the back of the tags, I added a journaling block that I printed from
my computer. These journaling blocks provide a place for Mommy & Daddy
to write a special little note to baby!

This was a pretty simple page. I made the banner across the top with
some of the cut-apart strips from the stack. I added "diamond" stickles
to it all for some added sparkle!

This is another pocket page. I made the pocket with a strip from the cut-apart page, matted with solid pink cardstock that I scalloped with the spellbinders scalloped borders. I added some stickles to the flowers for some sparkle!

This is the front of the tags. I used pieces of patterned cardstock from the stack, punched the corners with the decorative corner punch, inked the edges, adhered it to a slightly larger piece of solid brown cardstock that I spritzed with homemade glimmer mist, added a ribbon pull, and added an apoxy stickers to embellish.

On the back of those tags, after spritzing with the gold homemade glimmer mist, I heat embossed the corners, inked the edges of a small doily and adhered that. I them matted some of the cut-apart sentiments & designs and put those on top. I added some stickles to each piece for some BLING!

This is a pretty simple page. I used a piece of the blinged crown paper from the stack, added a piece of pink polka dotted washi along the side and top, and inked at the edges of the washi. I then added a metal medallion in the top left corner with silk flowers and a gemstone layered on top of it.

You may not be able to see it well, but the delicate lace on this page is gorgeous.
I received it in a swap and LOVE it! After adhering the lace only at the top of it, I added some pink ribbon, and a strand of pink flat-back pearls. I made the title with a carstock retangle, punched the corners, added an apoxy sicker, and went around it with some iamond stickles. I put some brass eyelets on each end.

This pocket was also made with the spellbinders scalloped borders die. I added a strip of pink polka-dotted washi tape in the center of the pocket, with a ribbon and ribbon slider to finish it off nicely.

This is the tag from that pocket page. After masking the center of the tag, leaving about 1/2" all the way around, I spritzed it with homemade glimmer mist. I stamped the corners with "fancy corners", then added stickles when they were dry. I adhered a silk flower to the top for a "pull tab", on top of that I added an apoxy sticker for added strength.

Closeup of the flower "pull". Added stickles to the tips of the flowers.

The backside of the tag has a place for journaling. I inked the edges of the doily before adhering to the page. The background is spritzed with that homemade glimmer mist. This journaling block was from the cut-apart page in the stack.

A close up of the stamped, fancy corners with stickles added!

This page is simple, yet AWESOME!! I inked the edges of the doily before adhering it to the page. I then layered several different flowers in the corner. I punched 2 scalloped circles... one in solid brown and one in patterned paper from the stack. I stamped the crowned heart on the patterned one and colored it in with coloring pencils.

I added a couple of stick pins for more depth and texture. I received these in a stick pin swap. They were just the right touch to make this page complete!

This page is pretty yet simple also. Just goes to show ya, that the right patterned paper/cardstock that you use can go along way! Just added a scalloped banner up top, matted with brown cardstock. Then a ribbon all tied up in a pretty bow.

This is by far the COOLEST page I have ever done!! It's a multi-flip page!! It has a total of EIGHT mini-flip pages with a place on the front of each for a photo. On the back of each mini-flip is a journaling block or sentiment from the cut-apart pages.


To help with the flipping of the mini pages, I "sandwiched" a piece of washi tape on the edge of each page and cut in a "fish tale".

The back cover of the album has the elastic band for closure. I punched a hole with my crop-a-dile big bite, pulled the elastic "hair band" through, and secured it with a decorative paperclip. Simple and easy!

This is what it looks like on the outside of the back cover.
Whew.... There you have it!! The finished "Sweet Daughter" Mini Album. Thanks for laying along; I hope this tutorial has provided some SPARK to get your INSPIRATION flowing for you to make your own mini album!!
TUNE IN next Friday, as I make my FIRST showcase for "Lone Wolf Designs" Design Team. Showcasing products from the facebook group...
Where products are sold at 75% of MSRP!
Check it out!! You'll be glad you did.
I love this mini album! Thanks for taking the time to go through it for us!
ReplyDelete